


Creating your first Hardhat project.
Setting up a local environment for Ethereum development.


Table of contents
In my previous article, we talked about the Solidity programming language and how it is used to write smart contracts. We also talk about the Ethereum Virtual Machine(EVM) which is needed for Solidity to work. The first option we have is to use the Remix IDE. The second option is to create a Hardhat project on our local machine. The Hardhat package can be installed via npm. Without further ado, let's dive right in.
Prerequisites
Knowledge of JavaScript and the Solidity programing language is needed. You can refer to my last article for a simple and brief overview of Solidity.
Why Hardhat?
Hardhat makes it easy to deploy your contracts, run tests and debug Solidity code without dealing with live environments. Hardhat Network is a local Ethereum network designed for development.
Installing Hardhat
We're going to be creating a barebone project, meaning, we will have the basic boilerplate codes but no plugins installed. We're going to be doing that ourselves. You need to have Node.js installed on your local machine for you to be able to install the hardhat package. Create a new folder where you want to create the project and navigate to it in your terminal. In my case, I'm going to be creating the new folder on my desktop
PS C:\Users\pc\Desktop> mkdir hardhat-project
Then cd into the folder
PS C:\Users\pc\Desktop> cd hardhat-project
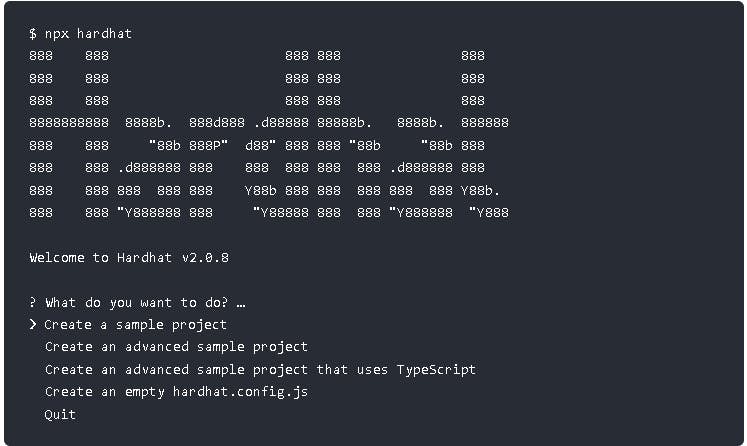
Inside the folder, run the command npx hardhat like so:
PS C:\Users\pc\Desktop\hardhat-project> npx hardhat
You will get a prompt to choose an option for what you want to do. Select the first option which is "Create a sample project".
Now you can open the folder in your favorite IDE and start coding. In my case, I'm using VS Code, so I use the command code . to open it.
PS C:\Users\pc\Desktop\hardhat-project> code .
You should have a similar folder structure to mine despite the IDE in use. Now we need to do the following before we can deploy our smart contract:
- Install the needed dependencies
- Write our smart contract
- Setup connection to a test net
Installing dependencies - the dependencies we need include waffle, chai and ethers and we install them all in one line. You can read about these plugins here
npm install --save-dev @nomiclabs/hardhat-waffle ethereum-waffle chai @nomiclabs/hardhat-ethers ethers
Writing our smart contract - in the contracts folder, you can create a file Storage.sol and copy the code below into it.
// SPDX-License-Identifier: GPL-3.0
pragma solidity ^0.8.0;

contract Storage {

    uint256 number;

    function store(uint256 num) public {
        number = num;
    }

    function retrieve() public view returns (uint256){
        return number;
    }
}
This smart contract in just a simple storage. We are declaring a variable called number at the top, then we have 2 functions, one to store the number variable and the other to retrieve it.
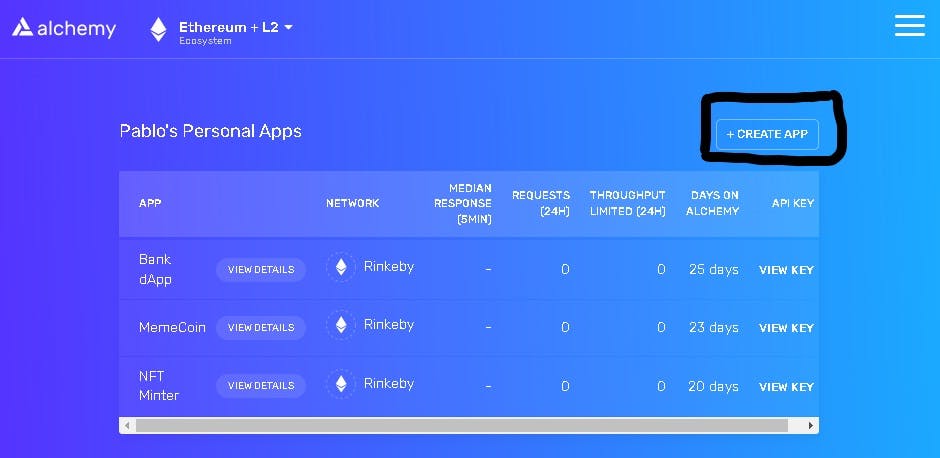
Setting up connection to a test net - this part might seen a little hard but trust me, it isn't. We want to make use of the Rinkeby testnet for this example. This is similar to using a free version of a service, although not entirely free, we need test Ether to perform transactions on the testnet. But don't worry, there are ways to get free test Ether. First, you need a MetaMask wallet, if you don't have one, you can go here. You can get free test Ether here. Then, you will create an account on Alchemy. Once, you have created your account, create a new app.
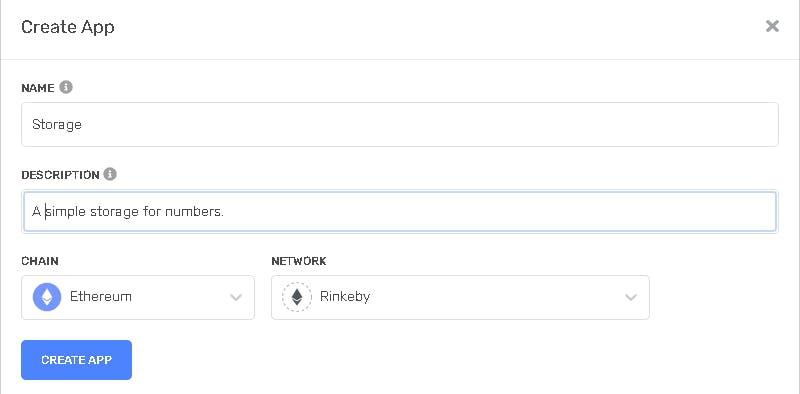
 Give your app a name and description, but most importantly leave it on the Ethereum chain and switch the network to Rinkeby.
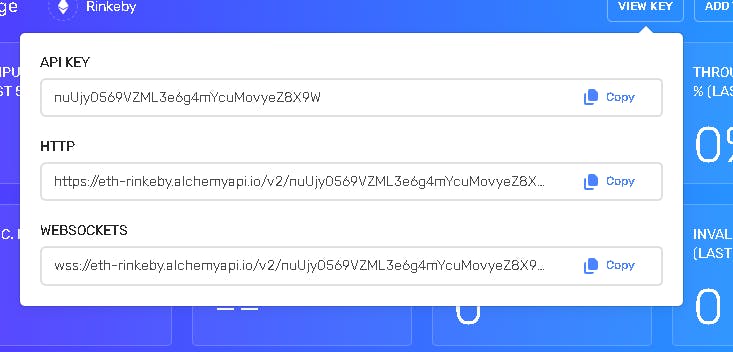
 You will be redirected to an app dashboard, here you will click on View Key.
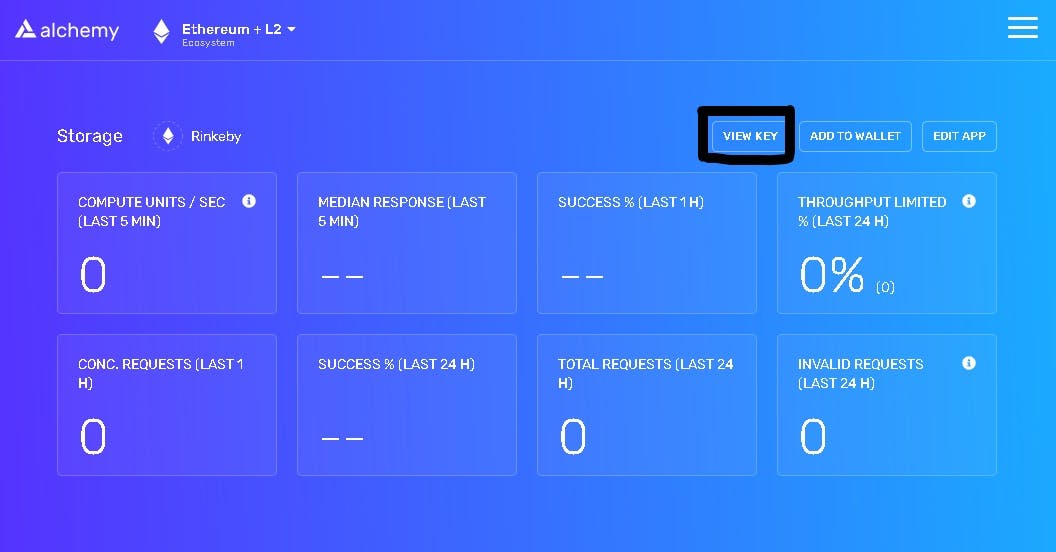 Copy the
 HTTP url and save it in a .env file as ALCHEMY_RINKEBY_URL in the root of your working directory.
 Now, that's half of it. You now need to copy your MetaMask wallet private key. See how to get it here. After copying it, save it to the
 env file too as RINKEBY_PRIVATE_KEY.
In the scripts folder, delete the contents of deploy.js and paste the code below into it.
// We require the Hardhat Runtime Environment explicitly here. This is optional
// but useful for running the script in a standalone fashion through `node <script>`.
//
// When running the script with `npx hardhat run <script>` you'll find the Hardhat
// Runtime Environment's members available in the global scope.
const hre = require("hardhat")

async function main() {
  // Hardhat always runs the compile task when running scripts with its command
  // line interface.
  //
  // If this script is run directly using `node` you may want to call compile
  // manually to make sure everything is compiled
  // await hre.run('compile');

  // We get the contract to deploy
  const [owner] = await hre.ethers.getSigners()
  const StorageContractFactory = await hre.ethers.getContractFactory("Storage")
  const StorageContract = await StorageContractFactory.deploy()
  await StorageContract.deployed()

  console.log("StorageContract deployed to:", StorageContract.address)
  console.log("StorageContract owner address:", owner.address)
}

// We recommend this pattern to be able to use async/await everywhere
// and properly handle errors.
main()
  .then(() => process.exit(0))
  .catch((error) => {
    console.error(error)
    process.exit(1)
  })
And delete the contents of the hardhat.config.js and paste the code below into it.
require('@nomiclabs/hardhat-waffle');
require('dotenv').config();

module.exports = {
  solidity: "0.8.0",
  networks: {
    rinkeby: {
      url: `${process.env.ALCHEMY_RINKEBY_URL}`,
      accounts: [`${process.env.RINKEBY_PRIVATE_KEY}`],
    }
  }
};
Now we are ready to deploy our contract.
NB: Remember that unlike regular deployments, you can't make corrections to a smart contract once it has been deployed. If you make corrections to your code and redeploy, you're creating a new contract that isn't remotely connected or associated to the old one. Now in your terminal, run the command
npx hardhat run scripts/deploy.js --network rinkeby
This command will compile our Solidity file and deploy our contract. And we will get the following response logged in the console
StorageContract deployed to: 0x0000aaaa1111bbbb2222cccc3333dddd4444eeee
StorageContract owner address: 0xAAAA1111BBBB2222CCCC3333DDDD4444EEEE5555
Congratulations, you deployed your first contract to the Ethereum blockchain. The first address is where our contract was deployed to and is very important.
Conclusion
In this article, we learned how to deploy a smart contract to the Rinkeby testnet on the Ethereum chain.
Thank you for staying till the end. If you enjoyed reading this piece please keep in touch and follow me to keep up with our articles on Web Development. In the upcoming articles, learn how to create a meme coin and mint NFTs.
If you are new to Solidity, check out the previous lessons about setting up a local development environment and writing your first smart contract. If you want to transition into Web3, check out Cadena.