


Summary
CSS can be fun(if you know your way) but it can get hard to maintain as it gets larger. That's where Sass comes in. Sass has features that makes readability and scalability easier and it's very easy to maintain. At the end of this article, we should be able to use Sass features like nesting, mixins, functions and inheritance. And just so you know, Bootstrap runs on Sass.
Prerequisite
You should be comfortable using CSS3 and a little knowledge of JavaScript.
What is Sass?
Sass stands for Syntactically Awesome Style Sheets. It is an extension of CSS3 and preprocessor scripting language that is compiled to CSS3. The scripting language itself is called SassScript. In essence, SassScript helps us compiled all the Sass code we write into CSS3 which the browser can then read. Sass consists of two syntaxes. The original syntax, called "the indented syntax", it uses indentation(whitespaces) to separate code blocks and newline characters to separate rules. The newer syntax, "SCSS" (Sassy CSS), uses block formatting like that of CSS. It uses braces to denote code blocks and semicolons to separate rules within a block. The indented syntax and SCSS files are traditionally given the extensions .sass and .scss, respectively. Sass allows the use of variables(you can do this with ":root" in CSS), it allows nesting like in HTML, it allows use of functions and "if statements", there are also other features Sass brings.
How to install Sass
Although Sass brings more power and control to styling, the browser can't read Sass codes so it needs to be compiled to CSS and you need dependencies to that. There are many ways to install and use Sass but we will be looking at the free and easy ones:
- Node Package Manager(npm) - you can install sass using npm in your command line or in your VS Code integrated terminal by using the following command.
npm install -g sass
Then you need to tell sass what file to build from and where to output it. For example running this command from your terminal would take a single Sass file, input.scss, and compile that file to output.css.
sass input.scss output.css
You can also watch individual files with the --watch flag. The watch flag tells Sass to watch your source files for changes, and re-compile CSS each time you save your Sass. If you wanted to watch (instead of manually build) your input.scss file, you'd just add the watch flag to your command, like so:
sass --watch input.scss output.css
You an also watch and output to directories by using folder paths as your input and output, and separating them with a colon. In this example:
sass --watch app/sass:public/stylesheets
Sass would watch all files in the app/sass folder for changes, and compile CSS to the public/stylesheets folder.
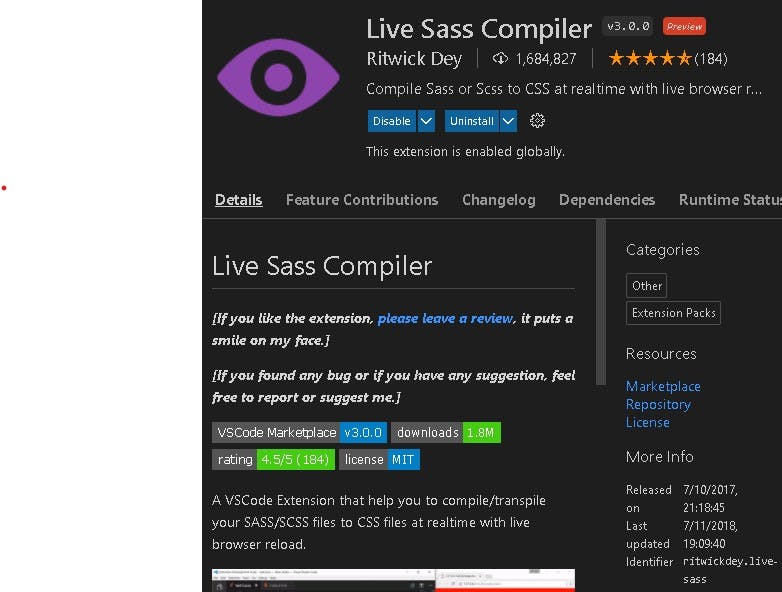
- Using a VS Code extension - you can also use a VS Code extension called Live Sass Compiler by Ritwick Dey(link: marketplace.visualstudio.com/items?itemName..). This extension watch for sass files and compiles into CSS.
 You can watch the files by pressing
 F1orCtrl + Shift + Pand selectLive Sass: Watch Sassin the dropdown list. It shows up in the output in your VS Code terminal and points to the compile CSS.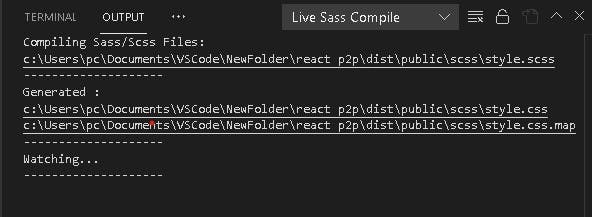 It will automatically create a CSS file for you and all you have to do is include it in your markup.

I recommend your try both approaches and stay with one that suits you.
Features available in Sass
We can't go through all but we will touch on commonly used ones.
PS: I'm going to bee using .scss syntax and I employ you to do so too until you are conversant with the syntax and feel you an move to the next level.
Variables
Think of variables as a way to store information that you want to reuse throughout your stylesheet. You can store things like colors, font stacks, or any CSS value you think you'll want to reuse. In CSS3 you can declare variables by using the :root syntax and you have to wrap the variable name in var() for the browser to be able to read it, like so:
:root{
     --primary-color: #777;
     --secondary-color: #c00;
     --font: 'Times New Roman', Times, serif;
}

body{
     background-color: var(--primary-color);
     color: var(--secondary-color);
     font-family: var(--font);
}
Sass uses the $ symbol to make something a variable, like so;
$primary-color: #777;
$secondary-color: #c00;
$font: 'Times New Roman', Times, serif;
When the Sass is processed, it takes the variables we define for the $font-stack and $primary-color and outputs normal CSS with our variable values placed in the CSS. This can be extremely powerful when working with brand colors and keeping them consistent throughout the site.
Nesting
Just like in HTML where you can nest elements and see the visual hierarchy. CSS, on the other hand, doesn't.
Sass will let you nest your CSS selectors in a way that follows the same visual hierarchy of your HTML. But beware that overly nested rules will result in over-qualified CSS that could prove hard to maintain and is generally considered bad practice.
Where regular CSS will look like this;
nav ul {
  margin: 0;
  padding: 0;
  list-style: none;
}
nav li {
  display: inline-block;
}
nav a {
  display: block;
  padding: 6px 12px;
  text-decoration: none;
}
Sass would be like this:
nav {
  ul {
    margin: 0;
    padding: 0;
    list-style: none;
  }

  li { display: inline-block; }

  a {
    display: block;
    padding: 6px 12px;
    text-decoration: none;
  }
}
You'll notice that the ul, li, and a selectors are nested inside the nav selector. This is a great way to organize your CSS and make it more readable.
Partials
You can create partial Sass files that contain little snippets of CSS that you can include in other Sass files. This is a great way to modularize your CSS and help keep things easier to maintain. A partial is a Sass file named with a leading underscore. You might name it something like _partial.scss. The underscore lets Sass know that the file is only a partial file and that it should not be generated into a CSS file. You can bring it into your main scss file like so:
@import 'partial';
You don't need to include the underscore or extension, just make sure it's in the same folder as the main scss file and it will pick it up. Partials are great for creating separate files for different components like buttons, containers etc.
Mixins
CSS3 can get a bit tedious to write and repeating the same code with different values an be tiring. A mixin lets you make groups of CSS declarations that you want to reuse throughout your site. It helps keep your Sass very DRY. You can even pass in values to make your mixin more flexible. Here's an example.
Regular CSS
.warning {
  background: yellow;
  box-shadow: 0 0 1px rgba(208, 208, 54, 0.25);;
  color: #fff;
}

.error {
  background: red;
  box-shadow: 0 0 1px rgba(139, 0, 0, 0.25);
  color: #fff;
}

.success {
  background: green;
  box-shadow: 0 0 1px rgba(21, 181, 21, 0.25);
  color: #fff;
}
Using a mixin in Sass would be like
@mixin theme($color){
  background: $color;
  box-shadow: 0 0 1px rgba($color, .25);
  color: #fff;
}

.warning{
   @include theme(yellow);
}

.error{
   @include theme(red);
}

.success{
   @include theme(green);
}
To create a mixin you use the @mixin directive and give it a name. We've named our mixin theme. We're also using the variable $color inside the parentheses so we can pass in any color we want. After you create your mixin, you can then use it as a CSS declaration starting with @include followed by the name of the mixin.
Inheritance/Extend
Using @extend lets you share a set of CSS properties from one selector to another. In our example we're going to create a simple series of messaging for errors, warnings and successes using another feature which goes hand in hand with extend, placeholder classes. A placeholder class is a special type of class that only prints when it is extended, and can help keep your compiled CSS neat and clean.
%message{
   width: 500px;
   height: 300px;
   background-color: transparent;
   border: 1px solid;
   border-radius: 5px;
}

.error {
@extend message;
   border-color: red;
}

.warning {
@extend message;
  border-color: yellow;
}

.success{
@extend message;
   border-color: green;
}
What the above code does is tells .success, .error, and .warning to behave just like %message. That means anywhere that %message shows up .success, .error, & .warning will too. The magic happens in the generated CSS, where each of these classes will get the same CSS properties as %message. This helps you avoid having to write multiple class names on HTML elements.
You can extend most simple CSS selectors in addition to placeholder classes in Sass, but using placeholders is the easiest way to make sure you aren't extending a class that's nested elsewhere in your styles, which can result in unintended selectors in your CSS.
Functions
Yup, you read right. You can create functions in Sass. Functions are defined using the @function at-rule, which is written as @function <name>(<arguments...>) { ... }. Functions allow you to define complex operations on SassScript values that you can re-use throughout your stylesheet. They make it easy to abstract out common formulas and behaviors in a readable way. And just like JavaScript functions, you can name them, pass arguments, perform arithmetic operations, return values and everything you can do in a JavaScript function.
//A function to set the text color by evaluating the background color
@function set-text-color($color){
    @if(lightness($color) > 70){
        @return $color-3;
    } @else{
        @return #fff;
    }
}

.body{
   background-color: $color;
   color: set-text-color($color);
}
Lightness here is a Sass keyword and there are several others. The function above, we evaluating the lightness of the background-color and return a specific color for the text. That way no matter what color the background is, the text will always be readable which is very useful when creting multiple themes for a site or app. Here is another function that involves arithmetic operation:
@function pow($base, $exponent) {
  $result: 1;
  @for $_ from 1 through $exponent {
    $result: $result * $base;
  }
  @return $result;
}
The above code block is same as this:
function pow(base, exponent) {
    let result =1;
    for(i = 0; i < exponent; i++){
        result= result * base;
    }
    return result;
}
And can be applied as thus:
.sidebar {
  float: left;
  margin-left: pow(4, 3) * 1px;
}
which will compile to this:
.sidebar{
   float: left;
   margin-left: 64px;
}
There are lots of other rules and features of Sass which we are very useful and helps us write minimal code, avoid unnecessary repetitions, easily maintainable and salable code. Try to find out more and more importantly, keep practicing, there is no better way to learn.
Conclusion
Sass is very power and puts your in control of everything styling. Now you just have to be careful not to use it anyhow or you code will be break. Start small and work your way up till you can maximize the uses of Sass.
Please leave your reviews, comments, suggestions and question and I'll be sure to look into it.
External Resources
- [Sass official documentation](sass-lang.com/documentation